Saturday 31 August 2013

Another look at our Dream Boat 3 in 1 Collections

We have had a lot of feedback asking to see what the actual product looks like, ask and you shall receive ....

 
CO723404


CO723405

 
CO723403

 
CO723402

 
CO723401

 
CO723400
 
 
Sue created this layout using Butterfly Notes Collection
 
for more inspiring projects from the Couture Creations Design Team using our Dream Boat Collections look HERE
 

Friday 30 August 2013

Celebrate by Patti Hamil

I wanted to do a dimensional card with some of the folders, and I wanted a blinged up look! So I used several Couture Creations embossing folders and then highlighted the raised areas with Glitzin' Glamour Glitter Glue!!! Used lots of foam tape too!!!

Here's my card!


I used some Glitter cardstock and made a little medallion and placed a stamped title on it. I placed it on a folder (ribbon pleated) strip of  Pastel cardstock inked green. I used a circle underneath them that I had embossed with the Exotic folder and used Crystalina Glitzin' Glamour on it.


Here you see some close-up detail!


Here you can see the folded cardstock that the medallion is on top of.


The background of the card is also a piece of cardstock embossed with the Exotic folder and highlighted with more Glitzin' Glamour in Lilac! This was lots of fun to do and it looks really festive too!!!

Couture Creations products used:
Fine Designs collection Exotic folder CO723256
Fresh and Fun collection Nuevo folder CO723276
Glitzin' Glamour Glitter Glue Lilac CO721975
Glitzin' Glamour Glitter Glue Cyrstalina CO721971
Foam Tape CO721965


Thursday 29 August 2013

Pure Pleasure with Dana Tatar


Hi Couture Creations fans! Dana here today sharing a clean and simple card. Some of my favourite embossing folders are from the Fine Designs Collection. I think the embossed images are simply beautiful and don't need much in the way of embellishing. I used the Pure Pleasure A2 Embossing Folder for this card.


I colored my embossed image with Distress Markers. The brush tip of the Distress Markers glided over the embossed areas, making coloring my image quick and easy. I filled in the flower centers with Aztec Gold Glitzin' Glamour. I then inked the edges of my floral design with Distress Ink.


I selected a sentiment stamp and added the text to the top of my card with dye ink. I then adhered the image to a piece of patterned paper and then onto a patterned card base.


I finished my card by adding Cafe Creme Self Adhesive Pearls to the corners of my colored image.

Thanks so much for stopping by today!


Couture Creations Supplies:
CO723259 Fine Designs Collection - Pure Pleasure Embossing Folder
CO721981 Aztec Gold Glitzin' Glamour
CO721999 Cafe Creme Self Adhesive Pearls

Wednesday 28 August 2013

Available NOW Dream Boat 3 in 1 Collections


3-in-1 Collections break apart a design into 3 parts that can be easily recombined for amazing craft effects. Each pack includes one 4 x 6 Inch acrylic stamp sheet, handpicked die selection from the packs artistic elements and a matching embossing folder. All of the pieces in each pack are designed to fit together perfectly, allowing you to combine stamping, diecutting and embossing elements for a myriad of design options.

Our Dream Boat collections combine stamps, dies and an embossing folder for quick, stunning cards in matching combinations


Our Dream Boat 3 in 1 collections are also perfect to use on your scrapbooking layouts.


Dream Boat 3 in 1 Emboss, Stamp & Die Collections are now available, look for them at your local Scrapbooking & Stamping store.
 

Tattered Lace Gift Box by Sue Smyth


Just recently I had to do an article on recycling in papercraft, along with some examples, which inspired me to do this pretty little gift box from the humble Toilet roll. 
Cut the Couture Creations Tattered Lace doily from White cardstock. Spray with spray adhesive and cover with glitter. 

Cover the toilet roll with pink cardstock, layer the glittered doily on top and attach with tape.
Create a rosette from ribbon. By cutting a small circle, from scrap cardstock and pleat ribbon around the edge holding in place with a hot glue gun.

Then make a sugared rose with Couture Creations Roses Die. As the per the tutorial in my last post, I use this technique many times so I have included again for you. 


Step 1 
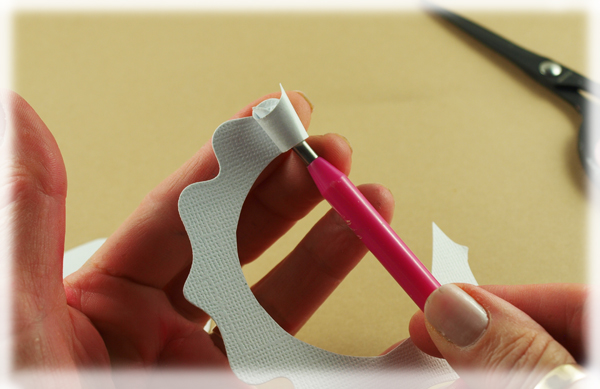
Cut out the largest shape from the Roses die from white cardstock


Step 2
Trim off edge about 1 cm in width


Step 3 
Roll up the spiral with a flower roller or bamboo skewer.


Step 4
Release and allow to unwind a little.


Step 5
Glue to the scrap white card with Hot glue. 


Step 6 
Trim off the excess white card.


Step 7
Use Couture Creations Tweezers to roll the petals.


Step 8 
Spritz with your choice of spray inks. Allow to dry or heat gun


Step 9
Spray with spray adhesive.


Step 10
Dip into a pot of white Glitter.


Step 11
Voila! one sugared rose. This works best on pale colours rather than dark and looks just like sugared violets  do


Handy Hint when spraying with mist, cover all of the flower and then apply just a little of a darker colour to the centre only.
to add a kind of dimension. You can do this with a paint brush or pipette. 


Thanks for joining me and I hope you are inspired. 
 
 
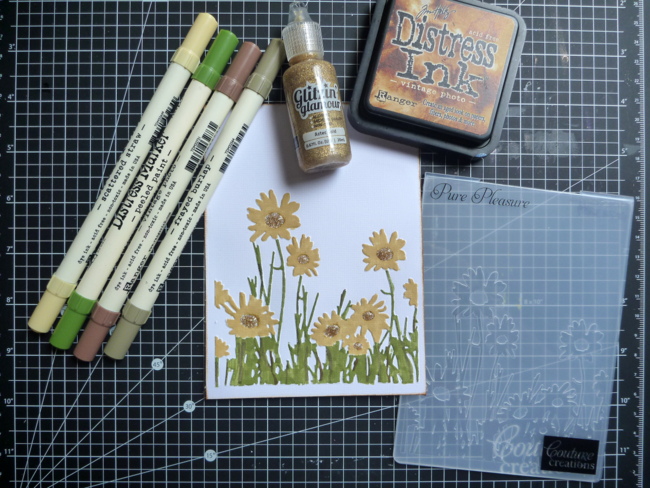
Couture Creations Products Used