Friday 30 October 2015

Halloween at Disneyland by Kerrie Gurney

#couturecreationsaus

Hi Everyone it's Kerrie here and
it's my turn on the Couture Creations Blog again.
For my last blog post for October of course I had to create a layout using one of my favourite photos from my big 50th Birthday trip to LA to visit Disneyland for Halloween last year


This photo was taken Halloween night at Disneyland and as you can see my baby girl & I are looking pretty fabulous as Maleficent and Aurora.

Here is a my tutorial on how to recreate this is a super quick and easy layout.


Start off diecutting 3 x Fans of Fantasia from the  Background Savvy Die collection from white cardstock and using sand texture paste adhere the diecuts to the background cardstock


then spray heavily with orange metallic mist and then hold the page up allowing some of the spray to drip down. Dry off using heat tool.


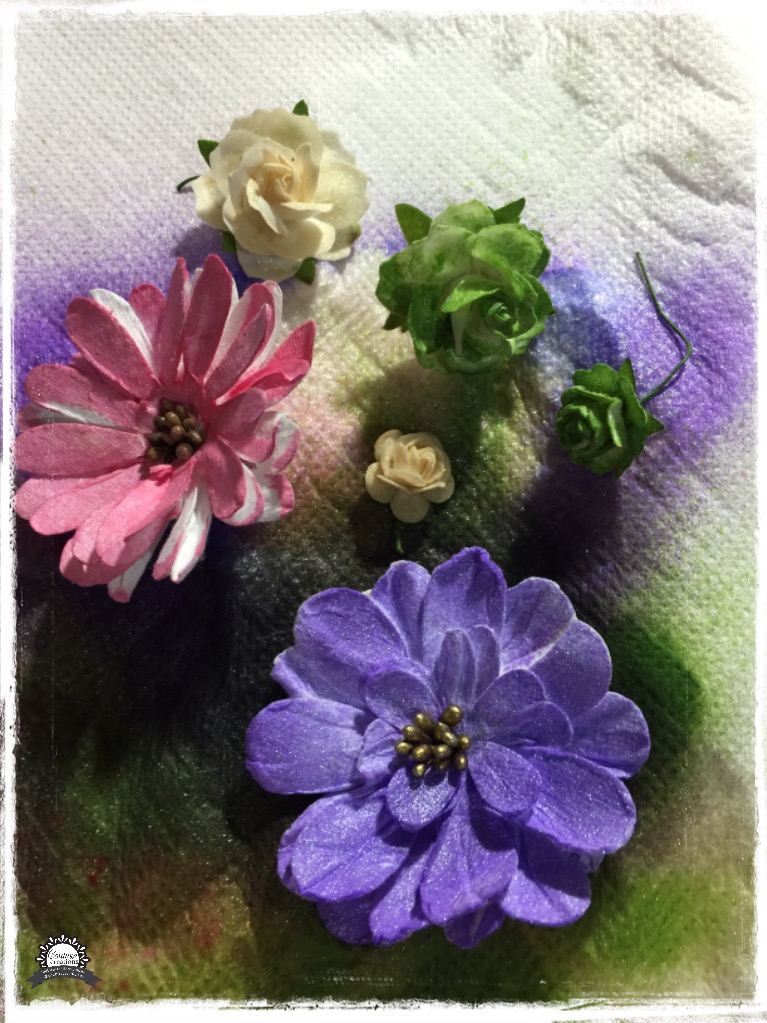
Grab a selection of Couture Creations paper flowers and a piece of Muslin


using a craft mat spray the flowers and muslin with the same orange metallic spray and then with a light spray of gold metallic spray. Use Heat Tool to dry off

TIP; grab another piece of muslin or some ribbon or flowers and rub around on the craft mat to soak up all the excess spray this saves wasting your sprays and gives you flowers and ribbon coloured ready for another project another day.


Next I coloured some Crystal Gemstones with a Black Sharpie to use on my layout
Then you are ready to layer everything onto your layout, here are a couple of closeups.


don't you just love all that sandy texture


Thanks for stopping by
Don't forget to follow the Couture Creations Blog and also follow Couture Creations on
FacebookPinterestInstagram and Twitter

Couture Creations Products Used

 Happy Creating and Happy Halloween 


Thursday 29 October 2015

Halloween Witch by Adriana Bolzon

#couturecreationsaus

Hi there everyone, it's Adriana Bolzon here today at Couture Creations, thanks for stopping by. 
Today I have a created a Halloween theme layout, using of course, the wonderful dies from Couture Creations and embossing folder from Ultimate Crafts.

Here is my layout "BOO" :)  


Using the wonderful products from Couture Creations

Here is the list of Dies
Background Savvy - Honeypot C0724088
Everyday Essentials - Autumn Leaf C0723112
Secret Garden - Pointy Fence C0724274
Ulitmate Craft Mistletoe Magic  Embossing folder - White Christmas ULT157306


white flowers
C0723019 Beaded Script flowers
C0724295 Cottage Pollen flowers


Firstly, I stamped the brown card stock - background with stamps and black ink pad.


Then I embossed 3 pieces of Coredination card stock with Ulitmate White Christmas embossing folder, sanding the embossed images
with Couture Creations Sanding Block  then cut them up
to arrange them on the page, as below.


Next I sprayed the Couture Creations Bulk white flowers
with orange and yellow spray inks, and sprinkled some black paint in the center of them, drying them with a heat gun.


Arrange the flowers on the layout, and adding cut and inked Everyday Essentials - Autumn Leaf C0723112
underneath flowers, also adding some Honeypot background die cut
and 
Secret Garden - Pointy Fence C0724274 for each side of layout.
Note that I highlighted the fence with a white uniball pen.
I also added some cobwebs, stitching and highlights to the chipboard Words


Thanks for looking, and Happy Halloween !!!


List of Couture Creations Materials


Please make sure you add your email address to get the latest newsletters.

Don't forget to join 
Couture Creations FACEBOOK

for all the latest updates from Couture Creations.


Thanks for looking
Cheers Adriana xx:)


Wednesday 28 October 2015

Halloween Crystal Skull by Tracey Cooley

#couturecreationsaus


Hi Everyone 

I found myself with a small empty bottle the other day!
Yes I now this is not a big deal really, unless it one of those Mini Crystal Head Vodka Bottles and Halloween is just around the corner.
I fill my Crystal Skull with water that I added a touch of food colouring too and resealed it.
 I then made it a Halloween Hat.


This will take pride of place in my Halloween decorations. To do this project all you need is a crystal skull, and some Couture Creations.


To make the base of your hat take some Couture Creations Circle Nesting Dies and cut a large circle then cut a smaller from the center or do them both at once!


Then take a strip of cardstock and roll it then attache the brim of your hat and the top of your hat.


Then cut a Couture Creations Lace Pockets and fun Tied together Saxony die and trim the edges so you are left with a neat rectangle. Then attach it to the front of your hat


Using Couture Creations 2mm Gemstones add a gem to the points where the pattern meet. 
Then of course we need to add flowers!! 
You can see how to make the flowers on my previous post for the Classic Violin you just need to use the second smallest Couture Creations Floral Layers Die
Here is a link to take you there FLOWERS TUT!


Once you have made your flowers you can then attach them to your hat! I have also used some coal coloured muslin underneath with a metal embellishment. then I took the Bird from the Couture Creations Secret Garden Sparrow on a branch and cut him out in black so he looked like a crow and added him above the flowers.
To finish it off I add some flourishes cut from the Secret Garden  Tall Flourish die. 
Oh and of course a little bottle of magic dust on the side!


Here is a closer look at the awesome Couture Creations Die cuts!
HAPPY HALLOWEEN EVERYONE!


Tuesday 27 October 2015

it's a Glittery Christmas by Jo Simons

#couturecreationsaus

Hello paper friends.
It's Jo and I'm back today to share some Christmas cards with you.  Yes I know its a little early but you have to seize the day when inspiration hits right?
Christmas cards can seem a little overwhelming as there seems to be so many to make so I grabbed a couple of favourite dies an embossing folder and some glitter paper, made 3 different cards and then I will just recreate in bulk.
Here are my cards

So these cards were super easy to make.  I have used 2 of the new Christmas dies from the Christmas Eve collection.  The two I used were Christmas Trinket and Cardinal Wreath
And of course I can't resist a good doily ;) so I also used the Rowena die from the Amaryllis collection.  My embossing folder of choice for these cards was the Cotton Thread folder from the Mikashet collection
Here is a close up of each individual card


 Couture Creations products used
 Tools used

Adhesives used
 
Hope I have inspired you in some way to make a jump start on your Christmas creating.
Until next time


Monday 26 October 2015

Sweet bicycle Card by Sue Smyth

#couturecreationsaus


Hi Bloggers, today I have a quick easy card for you 
with a spring touch.


Cut out the largest label from a 14 x 14 cm cream cardstock base.
Make sure you have the folded edge inside the cutting edge
of the die so it remains intact and there 
you have a neat folded base.
Trim off one on the ends to give the card a flat base


Cut the next size down with patterned paper, adhere to front of 
card base and fold semi circular shape up. Attach to front of
card with a little 3 D foam tape.

Die cut a scalloped circle and nested circle from cream and 
pale green cardstock.


Die cut a bicycle from cream cardstock, add glitter
to areas of the bike.
Also cut a small piece of lace from pink cardstock, ink edges
and adhere to bottom of card. 
Adhere all pieces in place and decorate as above.

This card can be made almost from scrap cardstock and papers.

Couture Creations materials 


Sunday 25 October 2015

Saturday 24 October 2015

Pretty Gift Bags by Anita Enright

#couturecreationsaus

Hi Ladies,

Do you ever get caught out with not having pretty packaging for gifts?  Well I was just recently.  Two lovely ladies from my work were leaving and I wanted something different to put gifts in for them.  The gifts were small as it was jewelry and you know sometimes store bought packaging just doesn't do it.
So I made these cute little bags using the envelope punch board.  They are made from one sheet of 30x30cm paper and end up being around the size of a A6 card.


The 30x30 paper was scored firstly at 1 1/2 inches and then punched it using the top punch on he board.  I then rotated the paper 90 degrees and scored at 3 inches again punching.  Rotate again 90 degrees and repeat at 1 1/2 inches and then again at 3 inches.  Flip the paper over and repeat. By flipping and repeating your score lines should match up. The final score lines are from the 3 inch to 3 inch marks and the 1 1/2 inch to 1 1/2 inch punch outs, these become the flaps.

Your paper should look like the picture below.


Along the score lines at the 3 inch marks trim down to the score line. Repeat on the other side of the paper.  Then, at the 1 1/2 inch marks I also cut down however this time do not cut along the score line, leave about 1/2 inch  on each side of the score lines as this is where the double sided tape goes to create the bag.
Prior to sticking the sides together the piece of paper looks like below. Fold along all your score lines.


Once joined together the box looked like this.  With a hole punch I punched two holes in the top to thread my ribbon through.


I  cut two each of the Beach Fern and Cycad Fern from the Everyday Essentials die collection.


I then selected a range of flowers and spritzed them in colours to match my papers. I also inked around my die cuts in a matching ink.


I then just decorated  the front of the bag as I liked.


 Below are a couple of close up shots of the two finished bags I created.  I can now say that both the girls thought they were beautiful.


Couture Creations Products Used

Until next time, enjoy your quiet moments crafting.

Anita E