ChristmasChristmas EmporiumChristmas EveCouture FlowersDecorative DiesGemstonesGlitzin' Glamour Glitter GlueJulianne McKenna-De LumenPaper PadsScrapbooking
Merry Christmas Layout by Julianne McKenna-De Lumen
#couturecreationsaus
This layout involves a fair amount of fussy-cutting, but it is definitely worth it, and comes together quickly once the cutting has been completed.
I have layered several layers on top of each other to create depth and dimension. For this layout, foam tape is your best friend!
And I have used Glitzin' Glamour Glitter Glue (red), to tie it all together with sparkly touches.
Shall we begin?
Start with lots and lots of bulk white flowers, including at least 5 large flowers and a handful of medium and smaller flowers, and spray them with a red colour mist. Once dry, I have sprayed a coat of Gold over the top to create a golden shimmer.
Your next step is to complete all the fussy cutting (it's good to do this while the flowers are drying). Find the appropriate Christmas papers and cut out the following - cherry vine, Merry Christmas title, two medium holly clusters, and a large bird on holly branches (I have actually cut the bird separate from the holly branch that it is sitting on).
You will need the presents, and hanging baubles dies, from the Christmas Eve Die Collection. Cut one set of the presents, and four sets of the baubles (one is a spare - I always cut one extra than needed, just in case).
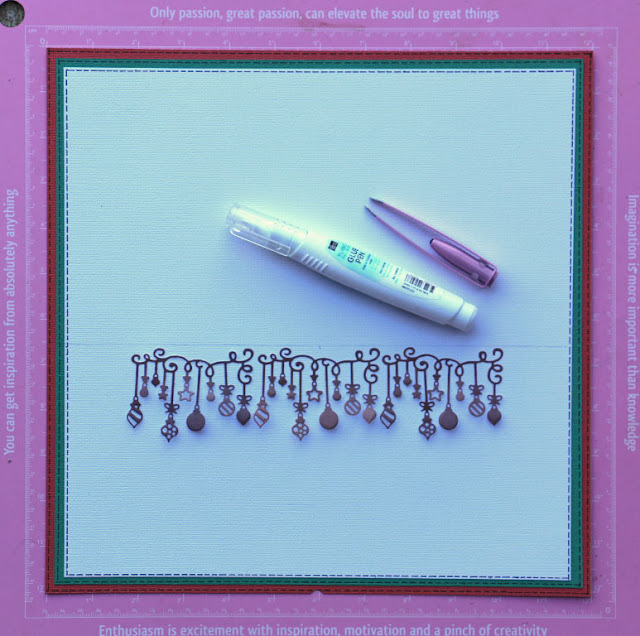
Let's create the layout base. You will need three sheets of cardstock - one white, one red, and one green. Cut the red to 12x12, the green to 11 10/16 x 11 10/16, and the white to 11 2/16 x 11 2/16. Now adhere the green sheet on top of the red, and the white sheet on top of the green, as shown in the photo. To add a decorative border, I have used a ruler and black pen to create a stitched border around all three layers. Alternatively, you could create those borders with a sewing machine.
Using a ruler and pencil, draw a line across the page, 6.5" from the top of the layout. Take three of your bauble die cuts, and glue them to the page, keeping them all just below the line. I have not glued the bottom edges of the baubles down, just the top ends, as I didn't want them to sit flat.
Take the cherry vine that you cut out previously, add lots of foam tape to the back side, and then adhere it to the layout, sitting just on top of the pencil line that you drew.
Continue by adhering the "Merry Christmas" title to the left hand side of the layout, sitting just a little above the cherry vine. Next, adhere 5 large flowers across the center of the page, using either glue or foam tape. Start with the middle flower, and work your way out.
Continue by adhering two photos to the right of the Merry Christmas title. I have used smaller photos, and layered one on top of the other, with the second one slightly tilted at an angle.
Take the large fussy cut bird, add foam tape to the back, and adhere it to the right of the page, sitting on top of the fifth (last) large flower. Take the branch that the bird was sitting upon, cut it in two, add foam tape, and adhere one piece under the bottom edge of the first large flower, and the second piece under the bottom edge of the fifth large flower. Take the two medium holly branches that you cut out previously, add foam tape to the back, and adhere them to the Merry Christmas title, as shown.
Take the large die cut present, and adhere it to the left edge of the layout, just beside the first large flower. Now, time to adhere all the extra flowers. I've tucked small flowers into each end of the large flowers, and added smaller flowers in and under the cherry vine, and Merry Christmas title. Refer to the photo for exact placement.
Finally, add the sparkles! I have added red gemstones to the right corner of the second photo (double layer), and to the top left corner of the layout, and along the center bottom edge of the layout. I have finished with Glitzin' Glamour Glitter Glue (red) highlighting the die cut present, and all the baubles. Allow to dry. Finish with any journaling that you may desire.
Thank-you for joining me today, and happy crafting!
COUTURE CREATIONS PRODUCTS:
CO724430 Christmas Eve Die Collection, Christmas Presents
CO724435 Christmas Eve Die Collection, Baubles
CO724435 Christmas Eve Die Collection, Baubles
CO724295 Cottage Pollen Flowers 6cm/50pcs
CO724298 Camden Beaded Cottage Flowers 6cm/50pcs
CO724296 Camden Cottage Roses 6cm/50pcs
CO724292 Tie Dyed & Jewelled Florettes 2.5cms/200pcs
CO724294 Tie Dyed & Jewelled Florettes 4cm/200pcs
CO724297 Camden Cottage Roses 3cm/50pcs
CO724298 Camden Beaded Cottage Flowers 6cm/50pcs
CO724296 Camden Cottage Roses 6cm/50pcs
CO724292 Tie Dyed & Jewelled Florettes 2.5cms/200pcs
CO724294 Tie Dyed & Jewelled Florettes 4cm/200pcs
CO724297 Camden Cottage Roses 3cm/50pcs


8 comments