#couturecreationsaus
And hello there crafty friends!
Nice of you to pop by and visit us here on the Couture Creations blog.
Are you as excited as I am by all the recent CHA updates and releases?
My golly GOSH! It sends crafters (me included) into a frenzy! I can't wait to get the new products and start creating with them. If you did miss out on any of our exciting updates, have a look
through our CHA 2016 sneak peak posts and see all the amazing new
releases coming very soon to a store near you.
One of my most favourite things about crafting is that there is no right or wrong.
There really isn't a "Craft Rule Book" that you need to follow. Pretty much anything goes!
And I love being able to use things in ways they weren't necessarily designed for.
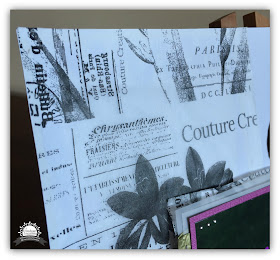
Every time I use my Quick Release Die Paper I admire how pretty it is, and how the pattern would look lovely on the background of a layout.
So that's exactly what I've used as my background "patterned paper" & teamed it with darling little doilies from the Perfectly Petite Doilies Die Collection.
And I just love how it's turned out!
I probably mention most posts just how AMAZING this paper is.
I've cut a length of Quick Die Release Paper longer than my white 12x12 Ultimate Crafts white card stock. Approx. 16inches long. I've then pleated the end of the paper, and cropped off any excess.
The only thing with using the Quick Release Die Paper like this, is that it's meant to be 'non-stick', so doubled sided tape isn't going to hold it. I've used the 15mm Jumbo Tip 2 Way glue stick around the edges and also attached some mini staples.
I've mounted my photo on layers of cardstock and vellum and then a final layer of Quick Release Die Paper. So that it sticks to the white cardstock background, and I've stapled a small square of off cut cardstock to the photo mats and mounted on foam tape.
Using a piece of 18mm doubled sided tape I've pleated some gold tissue paper from under the photo to the edge of the page. I had some white card stock form another project that had been sprinted with gold, so have cut 18 doilies (using your Quick Release Paper!) and adhered them to the right hand side of the layout, in the pleats and around the photo. The majority were adhered with doubled sided tape, and a few with 3D Mini Foam Dots to add some depth & dimension.
Who doesn't love a doily? There are 12 gorgeous designs in Perfectly Petite Doilies range - it's so hard to choose which ones to use! I've chose 4 that complimented each other, but were still different.
I've printed my journalling, cut into strips and placed on the layout with 6mm double sided tape. With the accent strip, I've mounted the words on 3D Foam Strips, on top the gold tissue paper which had 6mm double sided tape on the back. I've added my favourite 2mm Crystal Gemstones on either side of the word strips, 3 to the top of my photo, and to a few of the side doilies.
All that's left is to add a title, and you're done.
So I'm here today to remind you to step outside of the box, follow your own rules and look at things in a different way. You never know what you might use!
Until next month my friends.
Be sure to check the Couture Creations Blog to be inspired
by the amazing ladies on the Design Team.
You can also follow Couture Creations on
Couture Creations Products Used
CO721985 6mm Double Sided Tape
CO72196518mm Double sided Tape
CO723780 3D Foam Adhesive, 3D Mini Foam Dots
CO723899 3D Foam Adhesive, 3D Foam Strips
CO721961 12mm Foam Mounting Tape
CO72196518mm Double sided Tape
CO723780 3D Foam Adhesive, 3D Mini Foam Dots
CO723899 3D Foam Adhesive, 3D Foam Strips
CO721961 12mm Foam Mounting Tape
Have a crafty day!
Tracey R
xx


