#couturecreationsaus #ultimatecrafts
Hello everyone!
It's Robyn Wood joining you again as a guest designer and I'd like to share another card I created with the Sea Breeze Collection. The various pieces of the collection work really well together to give a lovely variety of cards.
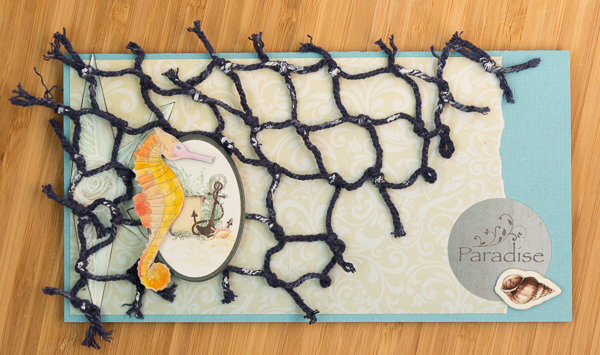
For this card, I used a less common card base size of 20 cm x 21 cm to really show off the blue netting that is part of the Sea Breeze range. The netting is cotton and very easy to manipulate by cutting, painting and inking.
I love the damask pattern on the Sea Breeze paper and used it as a base for my card. I think it will be very useful for non-ocean themed cards! I cut a piece measuring 18 cm x 10 cm and tore a small strip off a short end before affixing it to my card front.
The same sheet of paper has a subtle compass image and I thought it would look good peeking out from beneath the blue netting so I fussy cut it out. The compass image needed a little more embellishment but some sponging with blue ink, a few lines and scribbles with a white gel pen and black ink on the edges did the trick nicely. The adhesive sticker sheet that comes with this Collection suits a variety of uses and I popped out the Paradise circle and added it to the right hand lower corner. One of the tiny shells from the Adhesive Chipboard pack adds a bit of interest to the greeting.
I draped the end of the blue netting over the top left hand corner of my card and sniped a portion of it free. I wanted to tone down the dark blue and a few flicks of watery gesso gave it a good aged effect. Once dry, I attached it over the card front.
There is a trio of seahorses on the Seahorses & Gingham sheet so I added a bit of colour to them using dye markers. Sometimes markers can be a bit dark for the image you wish to colour, so I scribbled them onto a Non-stick Craft Mat and added colour to the images using an Aquash brush. A fine wet paint brush will also work well. I coloured two seahorses so that when layered, a bit of colour peeks through.
The seahorses were fussy cut and layered onto the side of the anchor oval from the Adhesive Chipboard pack and then nestled into the netting to finish off my card.
Couture Creations products used
I hope you enjoyed learning how I created this card. It has been a pleasure to work with the Sea Breeze Collection this month and I was honoured to be chosen as a guest designer to inspire you!


