Welcome 2014...it is Pam today on the Couture Creations Blog sharing with you how to make a Cracker Candy Container....I know I will be making these for my New Years Eve party because they are fun and easy to make....and who doesn't like easy...
I started by cutting two different pieces using my cutting machine...one in a pretty pattern paper the other with brown distress card stock....
I took the brown distress paper and trimmed the edge off using my Couture Creations Precision Trimmer....
so that I have two pieces.....
I took the straight pieces and the "A Songbirds Poinsettia" Embossing folder...
once I had the pieces embossed I sanded them using my Couture Creations Sanding Block....
Take Double Sided Tape...tape the brown embossed distress card stock on three sides and the pretty pattern paper on the outside edge....layer the brown embossed distress card stock on top of the pattern paper.
Tie together with pretty ribbon, add some of Couture Creations Gemstones, filled with candy or other items and add a few decorations to make a pretty Cracker Candy Container....
I hope you have a blessed 2014 and make a few of the Cracker Candy Containers sometime through the year.
Here are some more photos of the mini album, showing some images from the tree trimming, cookie baking, projects I made and present opening!! Thanks so much for taking a look!!
Hi Couture Creations fans! Dana here today sharing my December Daily Carousel. December is always a whirlwind month for me, so I thought a spinning album would be a fun way to document my days. I started with some notecards and photo sleeves and added texture and color with my favorite Couture Creations Wrapped in Joy Embossing Folders and some Premium Nesting Dies.
Follow these steps to create "chalkboard" finish embossed cardstock:
1. Emboss white cardstock with your favorite Wrapped in Joy Embossing Folders.
2. Paint each piece of cardstock with gesso. Let dry.
3. Paint each piece of cardstock with festive colors of watered-down acrylic paint. Let Dry.
4. Sand each piece of cardstock with a Sanding Block to reveal the white core.
Continuing with the chalkboard theme, I die-cut black cardstock with a Victorian Square Nesting Die to create date placecards to number my notecards. I stamped the numbers onto each square white ink.
Here's my notecards for the first half of the month. I tucked painted cardstock pieces behind the large photos and into photo sleeves for a pop of color. I attached the date cards to the back of each notecard.
If you are like me you always forget someone on your Christmas card list. Then you remember at the last minute and you may not have any cards left. Well.....if this happens I have a quick solution!
I grabbed my "Christmas Lyrics" and "Jolly Christmas" folders from the Wrapped in Joy collection. I used some specialty cardstock that is shiny and perfect for Christmas!
I embossed the Jolly Christmas on a gold piece a little smaller than 5x7 inches. And then embossed the Christmas Lyrics a little smaller than 4x6 inches. I did the larger on gold and smaller on red. Then trimmed the edges. I inked the red with a gold ink to bring out the sentiment.
Then I matted the sentiment on dark green cardstock and made a 5x7 base with the same green.
To finish it off I used foam tape for the sentiment and added a sparkly gold button with some green wax thread!!! That was it!!! Not elaborate, but still very pretty! Enough to let some one know that you "did not" forget about them!!!!
Thanks so much for stopping by for a visit!!! Don't forget to come back by to see what else we have to share with you!!!!
Today is the last day to enter our
12 days
Giveaway We have 3 Couture Creations Prize Packs
valued at $50AUD each to giveaway all the Details on
how to enter are HERE
Have you ever wished you had a bow to place on your package...well never fear because today I am going to share with you how easy it is...so get out your favourite Couture Creations Embossing Folders, some nice card stock and a brad.....
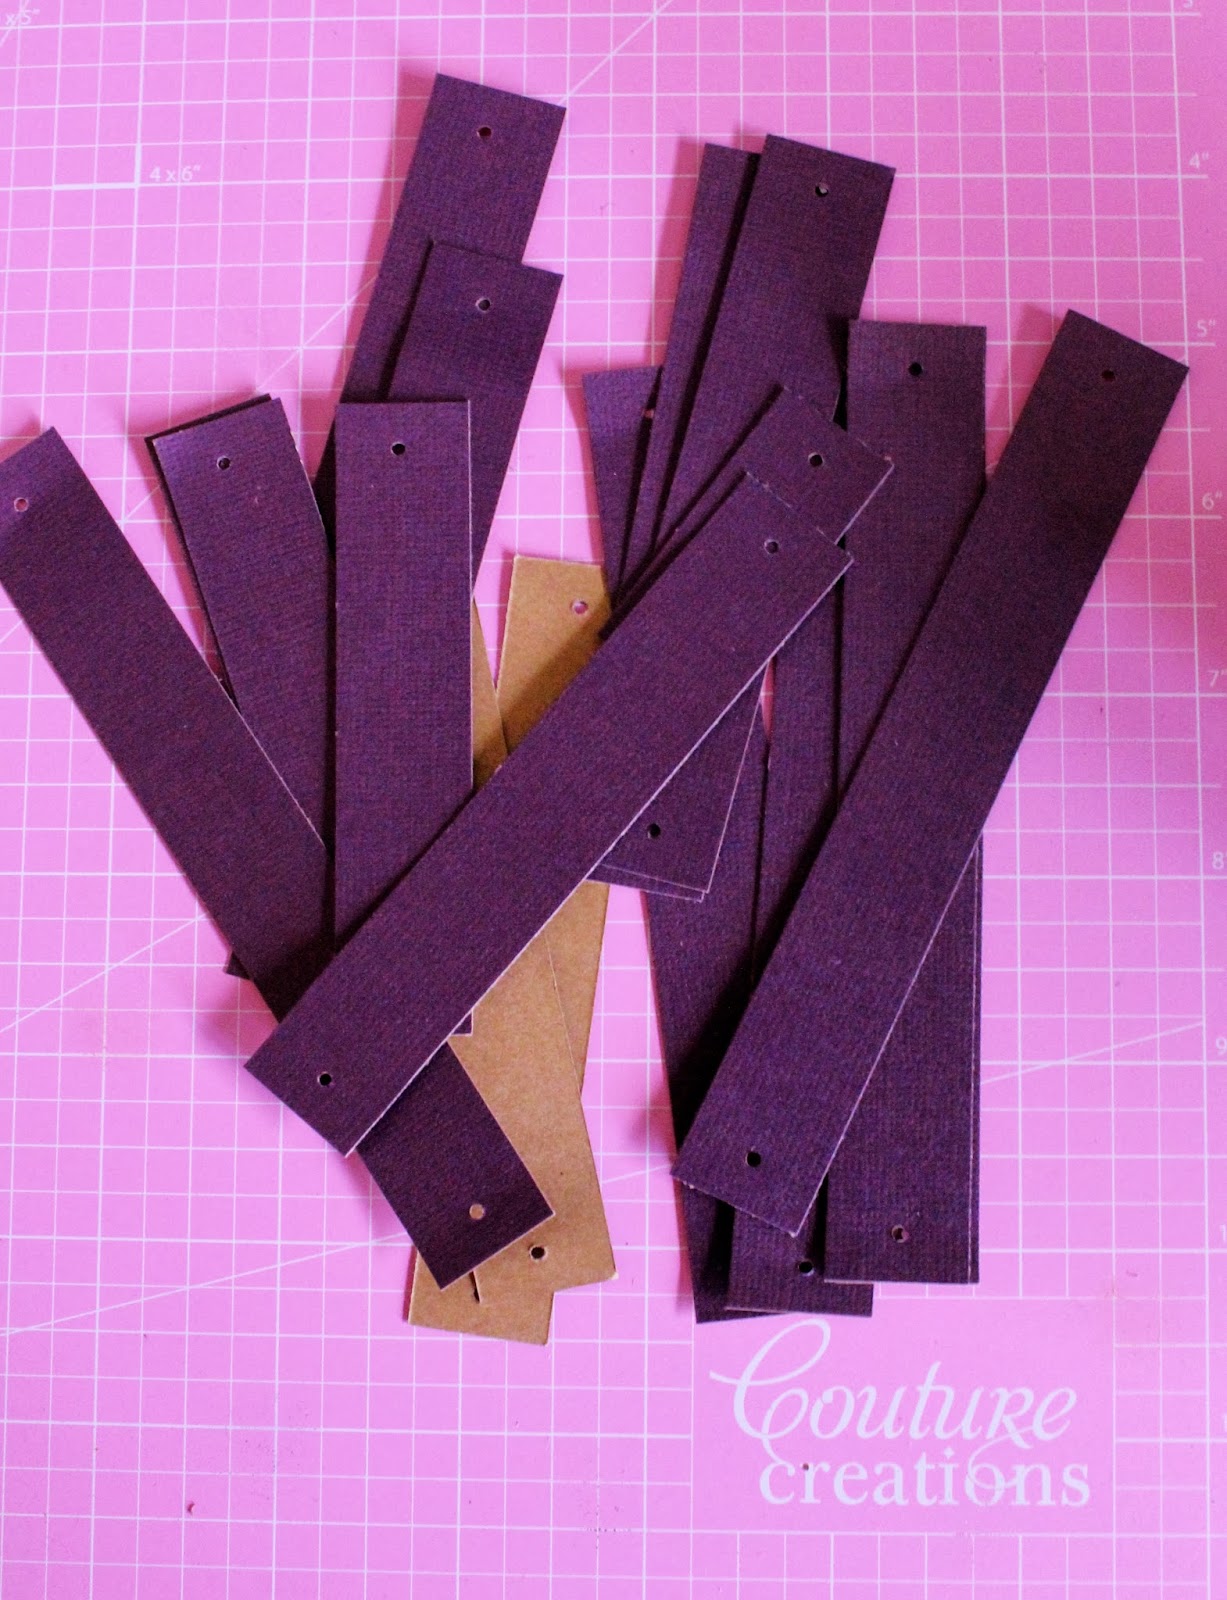
To begin cut the following card stock strips using your Couture Creation Precision Trimmer, I used a color core card stock to make my bow with.....
Once you have all your strips cut...punch a hole in both ends using a hole punch or your Handheld Essential paper piercer....
I always line them up so I keep them going onto the brad in the right order...
I start with the smallest, wrap it so the holes match up and place the brad through the holes...making sure the top is on the inside of the loop....I also stick a pencil or something in the loop once the brad is in place to keep it push out the back to place the strips on and to be able to work the loop on easier....
wrap each strip around your thumb...
and place them on the brad...once you have them all on the brad open the brad up to secure the strips
make sure to carefully twist the loops on the brad to straighten them up and just like that you have a beautiful bow....have fun making them.
Hugs Pammejo
Don't forget to enter our
12 days
Giveaway
We have 3 Couture Creations Prize Packs
valued at $50AUD each to giveaway
I've never done a December Daily before but wanted to give it a try! It is a little bit different from the norm. Mine is a mini that is kept inside a large 8x8 matchbox style box. This week I wanted to highlight the dies and embossing folders that I used on the box and mini cover inside and later this month I will show the inside of the mini with a few shots from this season's Christmas to remember!
I did a lot of fussy cutting of the embossed images for the cover, including Champagne and Holly for the holly leaves, Poinsettia Lullaby for the partridge and poinsettia, and Early One Morning for the lovely Christmas tree on the inside cover of the mini.
I used two gorgeous flourish dies from the Sophia collection: Stella and Oscar.
I love the extra detail that embossed image add to my vignette I have created and how the flourishes add to the design. I am so excited to have this a new piece of decor for years to come. I loved adding the little scene to the front of the box and the dancing scene on the cover of the mini.
Thanks so much for visiting today, I hope you like the project!!
Don't forget to enter our
12 days
Giveaway We have 3 Couture Creations Prize Packs
valued at $50AUD each to giveaway all the Details on
how to enter are HERE
Welcome, we create and distribute high quality, elegant products designed by enthusiasts and experts for the scrapbooking, cardmaking and craft industry.
We proudly support our family of internationally renowned Australian craft products like the GoCut and Emboss and GoPress and Foil!


