AdhesiveCore'dinations CardstockDecorative DiesDream BoatEmbossing FoldersGuest DesignerKate Nolan-DenhamStamps
Party Time by Kate Nolan-Denham
#couturecreationsaus
Happy Saturday, Couture Creations Fans!
Kate here again, sharing another card as May's Guest Designer.
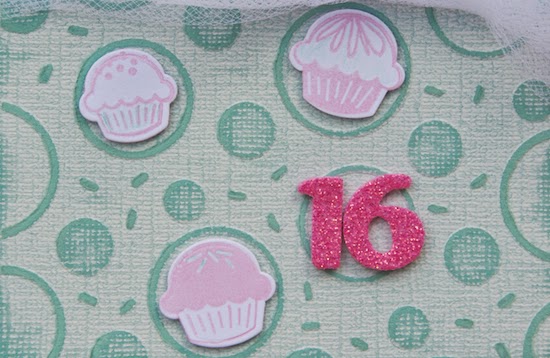
We keep an endless supply of birthday cards ready to go at our house, but there are times we need one made for a special person or a special birthday celebration. I created this Sweet 16 card for one of my daughter's friends using Couture Creations Dreamboat 3-in-1: Party Time Set. I love that the 3-in-1 sets have matching stamps and dies, along with a coordinating embossing folder!
To create this card:
1) Create a 4.5" x 6" card base with Core'dinations Whitewash Cardstock.
2) Cut a 4.25' x 5.75" inch mat using Core'dinations Gemstone and adhere to card base.
3) Emboss a 4" x 3" piece of cardstock (same as card base) with the Couture Creations Party Time Embossing Folder. Sand the embossed image so that it pops.
4) Stamp and die cut three cupcakes using the Party Time Set.
5) Stamp and die cut seven banners using the Party Time Set.
6) Die cut 7 more banners out of coordinating cardstock.
7) Trim down the top of the stamped banners so they are a smidge smaller than the cardstock banners and then adhere the stamped banners to the cardstock banners using Couture Creations Foam Mounting Tape.
8) Tentatively place the banners at the top of a piece of 4.25" x 3.5" white stamping paper (I used Core'dinations 110lb), then stamp the "Party Time" image tucked under the banner.
9) Using Couture Creations Double -Sided Tape, adhere the embossed paper (from step 3) to the stamped paper (from step 8).
10) Add a 12" piece of tulle.
11) Again, add Double-Sided Tape to the back of the embossed/stamped piece and adhere to the card base. The Double-Sided Tape will not only secure this to the base, but it will help the tulle lay flat.
12) Adhere the cupcakes (from step 4) to the embossed bottom using Foam Mounting Tape
13) Adhere the banners to the top using Double-Sided Tape.
14) Don't forget to tie and finish off the tulle!
This card whips up so quickly using the Party Time Set.
I hope you have enjoyed my tutorial and you are inspired to make your own Party Time Card!
C0721985 6mm Double Sided Tape
Thank You so much Kate for being our Guest Designer for May
We hope you have enjoyed both of Kate's projects as much as we have.
Don't forget to follow Kate's personal blog Scissors, Spatulas and Sneakers
and keep up with all that Kate is creating


6 comments