Adriana BolzonCouture CreationsCut Foil EmbossDesign Teamgentleman crafter collectiongentleman's emporiumGoCut and Emboss MachineGoPress and Foil Machinescrapbooking layout
Moment in Time layout with Adriana
Hi everyone, welcome back and thanks for stopping by, it's Adriana here today.
For today, I have created a layout using two papers and chipboards from the
and one of the new Gentleman Crafter Cut, Foil and Emboss background dies
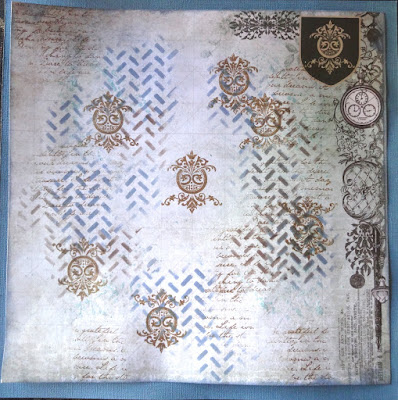
CO726775 Parquet Tiles die
to create a stencil for the background of my layout and also incorporating two die cuts to my layout . These dies are fabulous for card backgrounds but also thinking outside the square - you can create wonderful backgrounds with the die cuts for other projects.
Moment in Time layout by Adriana Bolzon
The photo is of my Nephew when he was a toddler. He is a bit cute, I think so :)
1. Trim down 1.25 cm around only on two side of the paper CO726821, ink edges with blue ink, adhere onto the centre of Denim Card stock.
3. Using a sponge dauber ink randomly around the centre of the layout with blue and dark brown ink.

4. Stamp randomly with the Gentleman's Emporium Ornate Icon Mini stamp CO726840 with brown ink pad on layout. Stamp randomly with script word stamp, as well.
7. Adhere all die cuts and matted photograph and papers, on the layout as shown below.
****
INSTRUCTIONS for foiling onto CHIPBOARD
WITH GO PRESS AND FOIL -
WITH GO PRESS AND FOIL -
just a reminder for those who don't know how to.
Turn machine on
Open Lid
Place Metal Shim on platform of machine
Place Metal Shim on platform of machine
Place cut foil colour side down (copper foil)
Place chipboards on top
Place a paper shim over the chipboard and foil for protection of the lid.
Close lid and let it heat for 30-40 seconds
Wind slowly the platform through and back in your die cutting machine.
****
9. Adhere all foiled elements as shown in photograph.
Decorate with leaves, flowers as shown in photograph.


Decorate with leaves, flowers as shown in photograph.


Couture Creations List of Materials
Gentleman Crafter Cut, Foil and Emboss background CO726775 Parquet Tiles GENTLEMAN"S EMPORIUM 12'x12' paper CO726821
Gentleman Crafter Cut, Foil and Emboss background CO726775 Parquet Tiles GENTLEMAN"S EMPORIUM 12'x12' paper CO726821
GENTLEMAN"S EMPORIUM 12'x12' paper CO726823
Gentleman's Emporium Ornate Icon mini stamp CO726840
Gentleman's Emporium Chipboards
CO726870, CO726869, CO726865, Co726868
Go Press & Foil Machine CO725032
Metal shim plate CO725578
Copper Heat activated foil CO725697
Champagne Heat activated foil CO725695
Denim card stock ULT200008
Endless Dusk card stock ULT200009
Black foam dots CO726429
Other: Flowers, leaves.
#artdecocreations #couturecreationsaus #ultimatecrafts


0 comments