
AdhesiveDamask DelightDecorative DiesDesign Team 2014Embossing FoldersJo PiccirilliMomentoNesting DiesOrnamental Lace DiesPaper PadsScrapbook & Papercraft ExpoThe HarmonyThe MetriconTools
Interactive Box by Jo Piccirilli
#couturecreationsaus
Hi everyone!
I love to make little boxes and books that are interactive. Lift a flap here, find a hidden tag there, so today I have a little treat box to share.

This is the box closed up. But this is what it looks like when the little belly band is slipped off and it is all open.
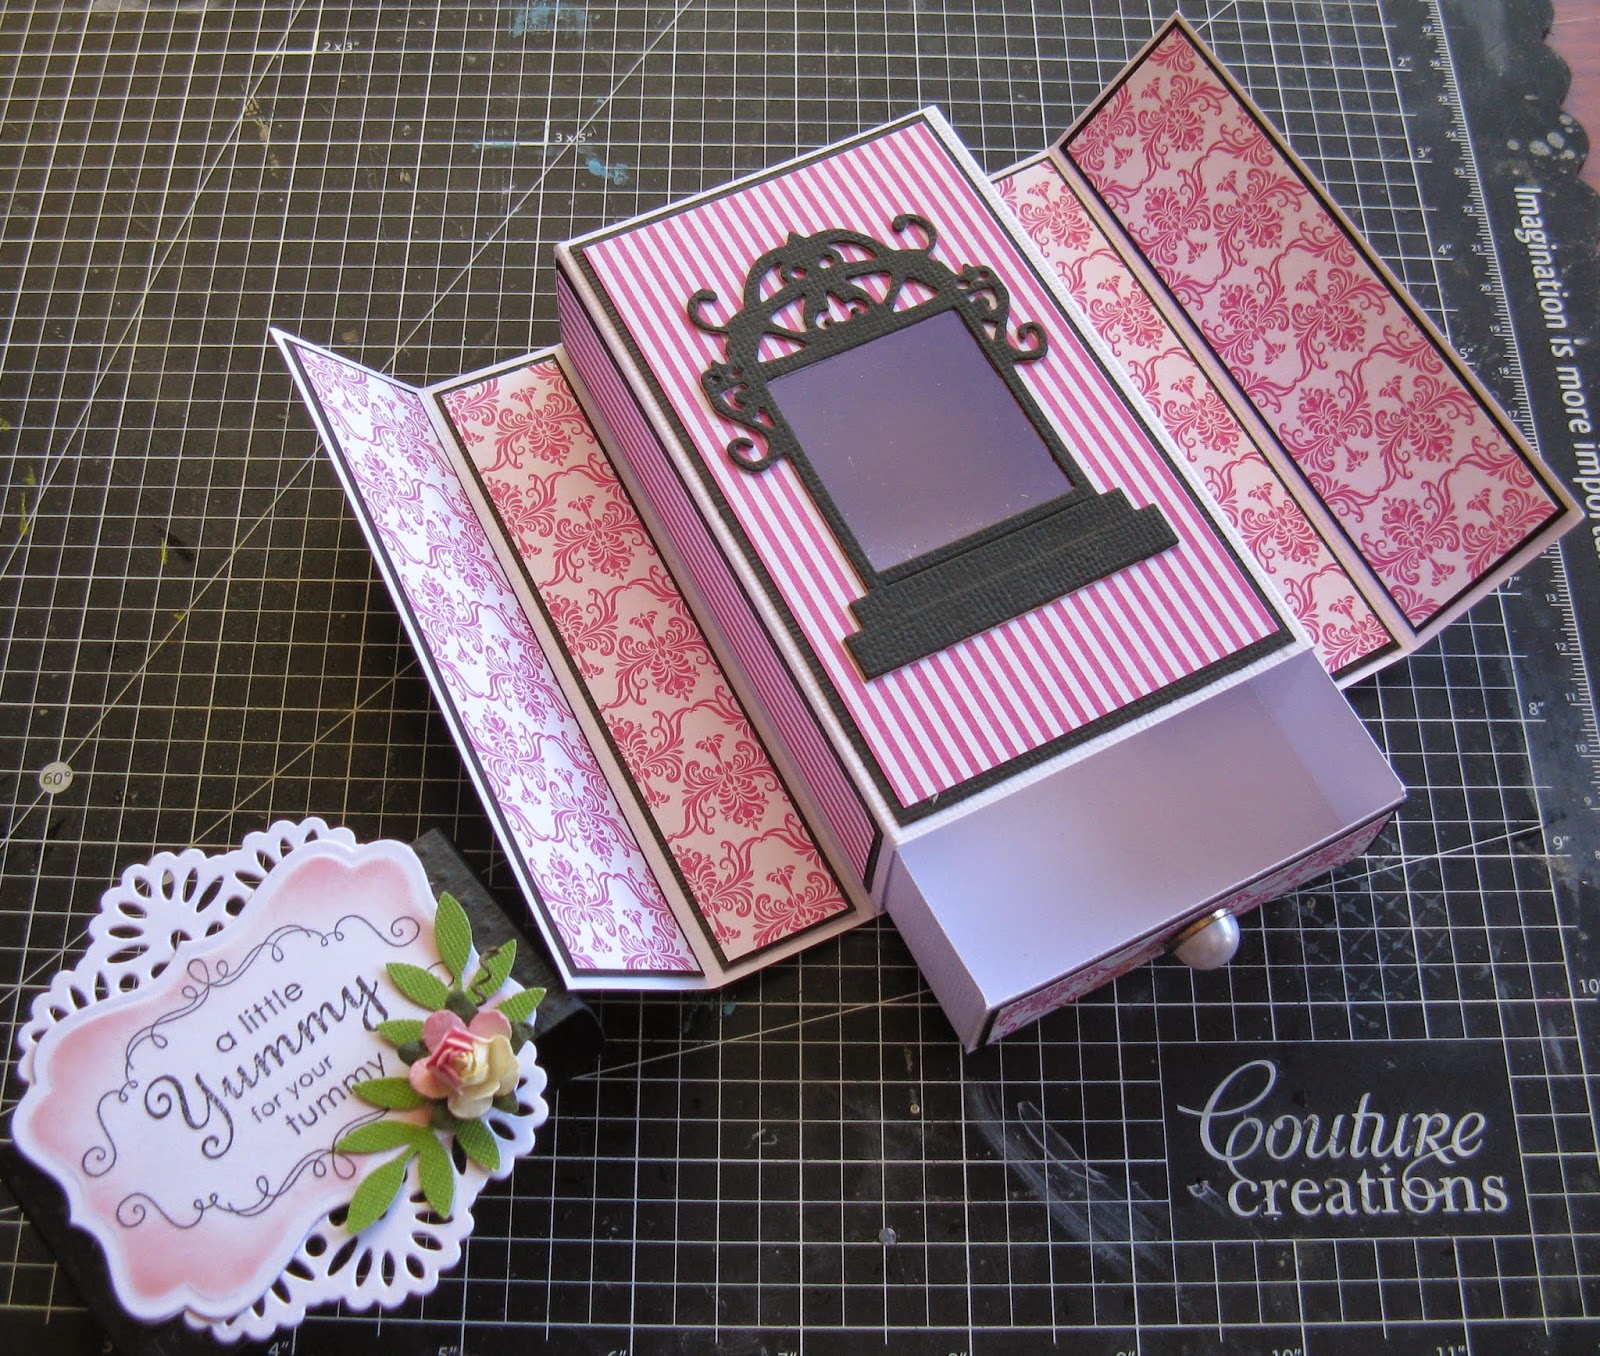
It has a little drawer underneath that slides out for some treats.
Here is a quick run down on how I made it.
You will need 3 pieces of cardstock.
1 x 8.5 inches x 5 inches
2 x 5 inches x 7 inches
Score your 8.5 inch x 5 inch as follows scoring down the short side
Score at 1.5 inches, 2.5/8 inches, 5.75 inches and 6 5/8 inches.
This is what it should look like

This is going to be the back cover that wraps around your box.
Next you will need to make the drawer.
Using one of your 5 x 7 pieces score 1 inch in from each side.

Cut on both opposite ends up to the score line to create tabs that can then be stuck down to create your drawer.

Lastly you will need to make the cover that wraps around the inside drawer. Here are the measurements.
Using your last piece of 5 inch x 7 inch score at 3/4 inch, 1.7/8 inch, 4,7/8inch and 6 inches.

Here is a look at how it all goes together.

Now you will need to cover your pieces. I have used the gorgeous papers from the Damask Delight paper pad .
Here is how I created the frame window
Before adhering your patterned paper to the inside of your drawer, using the Light Box Frame die cut one and lay it on paper. Trace around the inside square.


Using a knife and ruler cut out the frame.

Then cut two of the Light Box Frame die from black cardstock and stick over the top of your square cut out. You can then place some acetate underneath before adhering it to your base.

Once your little treat box is complete you will need to make a belly band to hold it together and give it a bit of "glam".
I used a piece of black cardstock and using the Small dots embossing folder, I embossed the whole length of it. To make your tag, I cut from the Victorian Nesting Dies and stamped my sentiment. I then cut a doily in half using the larger doily die from the Cameo set and tucked it under the top and bottom of my sentiment.
Here's a closer look at the belly band.


Thanks for stopping by. Until next time

Couture Creations products used:
CO723747 Light Box Frame The Metricon Collection (available July/August)
CO721986 Precision Craft Knife
CO721985 6mm Double sided tape


It is the last day of the Scrapbook & Papercraft Expo and it is not to late to book into one of our classes ...we look forward to seeing you there
***


6 comments