AdhesiveAlison BevisDesign Team 2016/2017EmbellishmentsEphemeraPaper FlowersPaper PadsSea BreezeStampsTools
Introducing Alison Bevis
#couturecreationsaus #ultimatecrafts
Hello,
my name is Alison - My husband Anthony and I have 3 children Tim, Emily
and Katelyn. I first created a scrapbook album for my Brother-in-laws
21st Birthday about 14 years ago but it wasn't till we moved back
to Brisbane that Aunty Sandra & I would go to card classes that my
journey in the Papercraft world really began - although I have 'crafted'
from a young age!
I've have organised Scrapbooking events including
Workshop Wonders, Bus tours, Scrapbooking Cruise, Retreats, Charity Crops
and Market days.
I don't really have a
distinct style but rather like to experiment, so I'm really looking
forward to offering a different perspective on the new
release Decorative Dies, Papers and coordinating embellishments from
each collection.
How exciting, my FIRST day on the Couture Creations blog!!
I wasn't sure what style of project to make so have chosen something simple with a bit of an interactive feature? This idea is great for kids cards too..
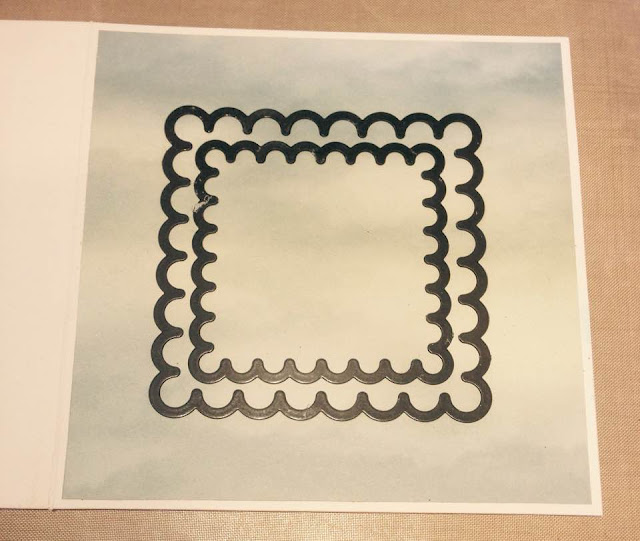
The first step is to die cut an aperture into the front of your card - I like to attached the cardstock to the card base and die cut through all the layers in one pass.
You'll notice I changed my mind and added another base layer and have used this as the frame.
Don't toss the scallop square...it will come in handy!
You might do this when you make a 'shaker card' also - I decided to have the 'shaker' element a small snaplock bag of 'clear hair gel' which I squirted a little mist into - you'll see I have two different gel bags for two projects... just for a bit of fun!!
Adding a couple of different colours will give you a swirled effect - just be sure not to mix it up too much?
When you adhere the gel bag to your patterned paper, you will need to add Foam mounting tape around the outside of the bag before attaching to the front of the card - I have added two strips on top of each other to allow the bag enough height to be flat on the card.
The stamp set 'On the Ocean' has that great image of a Sailing ship which I stamped in grey ink onto a pale patterned page from the 6x6" Paper Pad and fussy cut it out -
I also stamped the 'Courage' sentiment and cut this into strips - adhered with foam strips.
It's a bit nifty that the gel leaves little bubbles... which of course, add to the water effect?
By cutting the sentiment into strips it allows you to add 'The shore' to the opposite side and cluster with the ship and the Metal Trinket, of 'the shore' - perfect colour match too!
I've also added a piece from the Ephemera pack, on the left hand side (I snipped it in half, means half for another project if you're budget savvy like me?)
...a masculine card!!
..and while this is something you may not have tried or you are not a card maker...
you can also incorporate the 'gel bag' into a layout -
the gel does eventually dry out over time so is not archival quality, but rather a fun element to add to a mini album or such?
Sea Breeze layout with a 6x6" Paper Pad
Starting with a sheet of cream cardstock I created a background with ink and mists -
the Ship's Wheel has been stamped in pale blue and pale brown across the page and then some flicking of coordinating blue and brown mists
...again you'll need to raise the layer with the gel bag with 2 strips of foam tape
I layered the photo on various papers from the 6x6" paper pad and the frame is from the Diecut Ephemera pack - instead of throwing away the Scallop Squares from the card I've include them on the layout too (..more budget savvy tips!)
For the Banner element I started by adhering the pre-knotted twine across the base of the photo and then foam mounted the banner pieces - easy!
The top flower is such a pretty flower... you can pull it apart and have 3 flowers, which you can then ink, colour and adhered to your project - the flatter ones are great to stamp onto also!
Paper flowers are also great to colour with mist or ink - scrunch while it is still 'wet' and allow to dry so the flower looks more natural?
A seagull Trinket watches over the fish and the fishing girl from the top corner -
I do love to fussy cut - the 6x6" Paper Pad has a sheet full of great images, including these 3 fish!
I die cut the window with the Nesting Heart set... so the fish could 'swim' in the water?
The finished layout,
...just needs a little journalling of the story!!
On the pale heart will be perfect, don't you think?
Don't forget to check back tomorrow and see what the other ladies have created on the
Products used:
White Flowers:
Thank you,
Alison


3 comments