Corner Pattern cards with Joanne
Hi everyone, Joanne here today. For my project I've made two versions of a card - one using traditional stamping with ink and a corner stamp to create repeat patterns; and the other using hot foil stamping and a corner hot foil stamp to create the repeat patterns. The square pattern in the middle of the topper and the decorative strip at the side are created using one corner stamp or hot foil stamp.
My backing paper is from Couture Creations Gentlemans Emporium collection and I've added black card for the mats and corners and created my pattered topper and side panel using kraft card.
Full instructions for creating the stamped and foiled panels are in my video - the link is at the bottom of this blog post.
To create the stamped version I've used a stamp press with a hinged lid, so that I can do repeat stamping and just move the card each time. The same principle is used for the foiling - the hot foil stamp is set in position and the card is moved each time.
For the topper start with a square of card 11cm x 11cm. Draw lines on one side across from corner to corner diagonally, crossing in the centre and then from the middle of one side through the centre to the opposite side.
For the border panel, I started with a piece of card 8cm wide and 21cm long. Draw lines along it's length 2cm from each of the long sides. Draw a line across the mid point, 10.5cm from each end and then add lines 3.5cm apart measured out from the mid point. It's important to measure out from the mid point so that if the card is slightly more or less than 21cm long the difference will be at the ends and not mess up the spacing of the pattern in the middle.
For the ink stamped version you need to transfer your marks to the front of the card along the edge. These are used to line up the card each time you move it to stamp the next piece of the pattern.
See the video at the bottom for the process of positioning your stamp, or hot foil stamp and how the card is moved for each of the designs.
Once you've stamped or foiled your topper and panel, trim them and mat onto black card. Leave the side panel longer than you need until you have stuck it down on your patterned paper - then you can trim it to the exact length of the paper from the back before sticking the paper down on its mat of black card.
Before sticking down the topper, stick one of the card embellishments from the ephemera pack in the top right corner of the card.
I cut a border strip from another of the 12x12 papers in the collection and wrapped it around the centre of the topper, raising the middle of it up on two layers of foam pads. Then add more foam pads to the back of the topper and stick in in place on the front of the card.
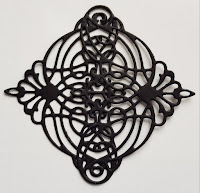
For the embellishment in the centre of the topper, stick 2 of the corner die cuts together and stick in place before adding the sentiment.
I've completed the cards by adding a playing card from the Ephemera Pack tucked under the topper, another sentiment at the top of the side panel, and a pocket watch overlapping the bottom right edge of the topper
Full details for stamping or foiling the side panel and the topper are in my video below.
Couture Creations Products:
CO726039 - Grey (Dark Mirror Finish) Heat activated foil
CO726826 - Gentlemans Emporium - Die Cut Ephemera Set
CO726834 - Gentlemans Emporium - Gentlemans Corner Mini Die
CO726831 - Gentlemans Emporium - Gentlemans Timepiece Mini Die
CO726844 - Gentlemans Emporium - Acanthus Corner Mini Hotfoil Stamp
CO726837 - Gentlemans Emporium - Gentlemans Corner Mini Stamp
CO726813 - Gentlemans Emporium - Gentlemans Emporium Collection Pack - with Stickers, Postcards and Papers - 12 x 12in
#couturecreationsaus


0 comments