Thank You Bottle Tag with Lee-Anne
Hello all Lee-Anne here today and welcome back to my post for the Couture Creations Design Team.
As we head towards all the end of the year and the start of the year end functions, here is an easy to make Thank You Bottle Tag which will come in handy to give to the host with a bottle of their favourite drink.
For detailed instructions on how to make up this Bottle Tag or card, please can you watch my video here:
https://youtu.be/obb0NFEE7IY
Created with the Gentleman’s Emporium paper collection, the Gentlemen’s Emporium Ephemera collection, the Couture Creations mini guillotine, the GoCut and emboss machine, the Go press and Foil machine and the Couture Creations scoring board.
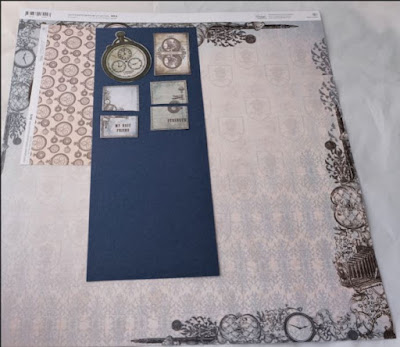
For this project you will need: 25cmx10cm navy card stock, 15cmx9,5cm pattern card 05B, 2x mini tags cut in half from the 6x6 10A page, clock from the Die Cut Ephemera Collection. A 6.5cm and 6cm Circle die, thank you die cut foiled with silver, 2x Mini Exquisite Gentlemen Die cuts, 17cm silver foiled black organza ribbon, brick die cut from blue card. Black Foam dots, blue glitter washi tape and black angle hair, 2x mini black cogs.
To assemble your bottle tag, score your blue card at 9.5cm on the long side. Using the smaller circle die, place the die on the smaller side of the card in the middle and cut the hole using your die cut machine. Set aside and keep the die cut circle for another project. Trim your 30x30 pattern page down to 15cmx9.5cm and set bigger piece aside for another project. Using the left over piece from the cut-off strip and both the circle dies, place in the page and cut the circle rim to go around your blue cut hole. Set aside for later use.
Using the pattern page cut above and the two tags for the 6x6 page cut in half, position the tags onto the card as shown. Position and stick down the brick wall die cut overlapping the mini tags. Using the clock from the Ephemera collection, stick down overlapping the brick wall and the tags on the right hand side of the card. Stick the blue glitter washi tape overlapping the clock and brick wall. Using the silver foiled organza ribbon * (see below for instructions on how to foil the ribbon)stick down overlapping the organza ribbon.
Stick the mini circle border around the cut-out hole on the blue card.
Raise the tag from the Ephemera collection with black foam dots and stick onto the ribbon overlapping the clock. Stick the black angle hair down with a glue dot to the left of the tag and ribbon. Stick the foiled thank you sentiment *(see below for instructions on how to foil the sentiment) onto blue card, raise with the black foam dots, stick down overlapping the tag and clock. Raise and stick down the two die cut Exquisite Gentleman just to the right of the sentiment overlapping the clock. I did not like the gap above the sentiment and the angle hair, so I stuck down mini black cogs to fill the area and finish off the card.
Congratulations, herewith your finished Thank You Bottle Tag.
This tag can also be converted to a greeting card. To do so, in the initial steps, trim the blue card to 15cmx10cm and the pattern card to 14.5cmx9.5cm, stick both onto a standard 15.5cmx10.5cm folder card and follow the same instructions to finish the card. Enjoy!
* How to foil the ribbon and sentiment:
Turn on your Go Press and Foil machine to heat up.
Ribbon: Place the hot foil stamp onto the heating mat, facing up.
Add the heat activated foil on top of the foil stamp with the shiny coloured side facing down, tape the organza ribbon in place on top of the foil.
Place a scrap piece of paper to cover all to ensure that the foil is not transferred to the lid of your machine.
When the green light comes on your machine, remove and slowly run through your Go Cut and Press machine.
Carefully remove the paper and ribbon from the foil and replace into the heating platform into the machine.
Die cut Thank you sentiment:
Place the silver metal conversion plate onto the heating pad.
Place the die cut onto the metal plate facing up.
Add the heat activated foil on top of the die with the shiny coloured side facing down, add the card to be cut.
Place a scrap piece of paper to cover all and to ensure that the foil is not transferred to the lid of your machine.
When the green light comes on your machine, remove and slowly run through your Go Cut and Press machine.
Carefully remove the paper and die cut from the foil and replace into the heating machine.
Couture Creations Products:
C0726818 12 x 12 PaperGentleman’s Emporium - Double Sided paper 09B
C0726818 6 x 6 Paper – Gentleman’s Emporium - Double Sided paper 10B
C0724824 – Go Cut and Emboss Machine by Couture Creations
C0726826 – Gentleman’s Emporium Die cut Ephemera Set
C0726032 - Go Cut and Foil machine by Couture Creations
C0726848 – Border Collection Hotfoil stamp set
C0726343 - Couture Creations - Mini Guillotine
C0726828 – Exquisite Gentleman Cutting Die
C0726428 Self-adhesive foam dots
Silver heat activated foil
#couturecreationsaus


0 comments